How to do a Webinar on Zoom – The Complete Guide
“How to do a Webinar on Zoom?” is one of most common questions I get from my online coaching students.
And there’s a good reason for that too. Let’s discuss this further before we start with the tutorial.
Why you should use Zoom to do a webinar?
Zoom is one of the most inexpensive ways to conduct a webinar.
There are other webinar software out there also but all of them are very expensive as compared to Zoom.
Now even Zoom itself has a webinar add-on which makes Zoom equally expensive to the other webinar software but the good news is that you don’t need the webinar add-on to do a webinar on Zoom.
You can simply use the default Zoom meeting software to conduct a meeting and turn the meeting into a webinar.
Okay so Zoom is cheap. That’s good. But is it also reliable?
Yes, absolutely.
Usually when something is cheap, we always think that it may have some flaws.
While using the basic Zoom meeting software does have some flaws and I will discuss those later on, reliability isn’t one of them.
Zoom is 100% reliable.
In fact there have been situations where my more expensive webinar software failed me during my LIVE webinars and I had to quickly move all participants over to Zoom.
Zoom rescued me so many times that I actually stopped using those expensive webinar software and started using only Zoom for my LIVE webinars.
So now that you know the reason as to why you should use Zoom, let’s get started with the tutorial.
How to do a webinar on Zoom (The Set up)
Creating a Zoom account
The first thing you will obviously need is a Zoom account.
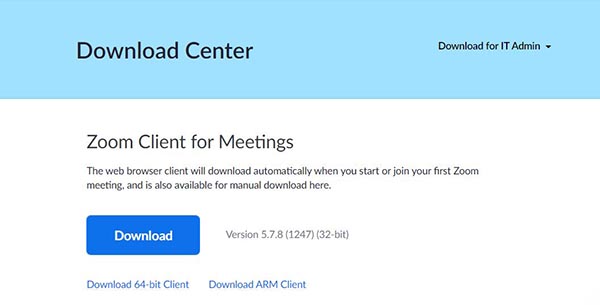
For that the first thing you need to do is to download the Zoom software from here.
Under the “Zoom Client for Meeting” option, click on Download as shown below:
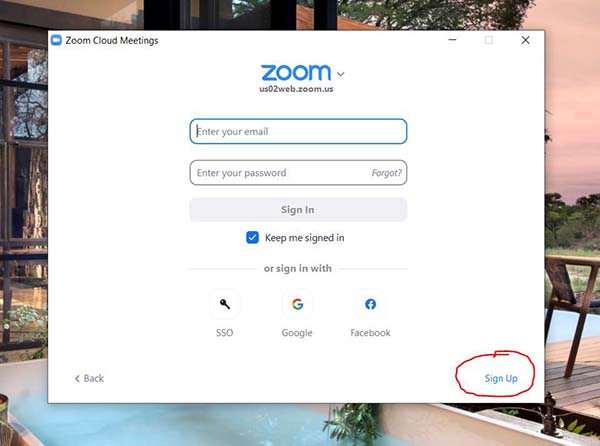
Once the Zoom app downloads and you have installed it, open the app and then click on Sign in and then on the Sign up button as shown below:
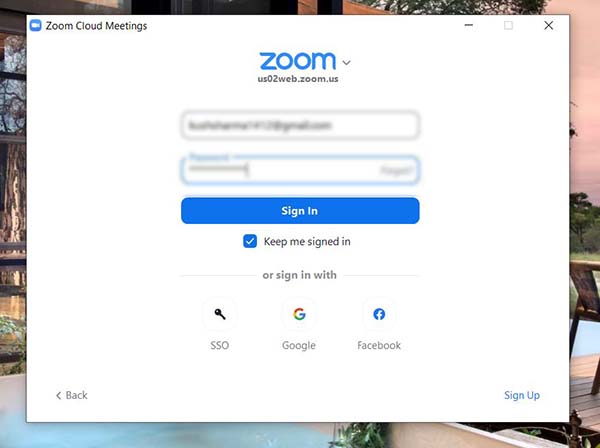
Finish the process of signing up. After you sign up, you will most probably see that Zoom takes you to the browser version of your profile (called the Zoom Web Portal).
You can close that and open up the app again and then sign in from there like shown in the image below:
I always find it’s easier to use Zoom from the app rather than the browser.
Creating a Meeting in Zoom
Ok so now that you are signed in inside the app, you will see the following screen:
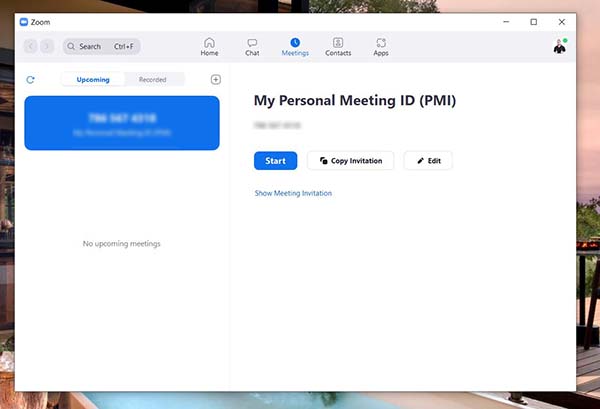
Here click on the Home button on top and then you will see the following screen:
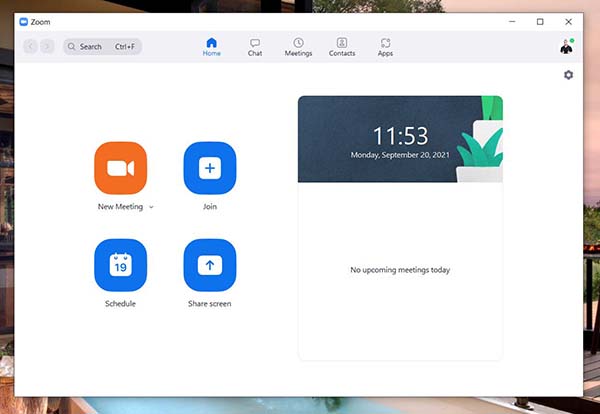
Here click on the Schedule button.
So what we are doing here is that we will actually be creating a meeting.
Now a meeting isn’t actually a webinar in itself.
Zoom basically designed the meetings feature so that small teams could set up quick meetings with each other.
But since Zoom allows 100 participants even on the free plan, we can use it to conduct a meeting for 100 people, which basically turns it into a webinar for 100 participants.
So one thing to note here is that in this article the term meeting or webinar means the same thing.
After clicking the Schedule button you will see a window like shown in the image below:
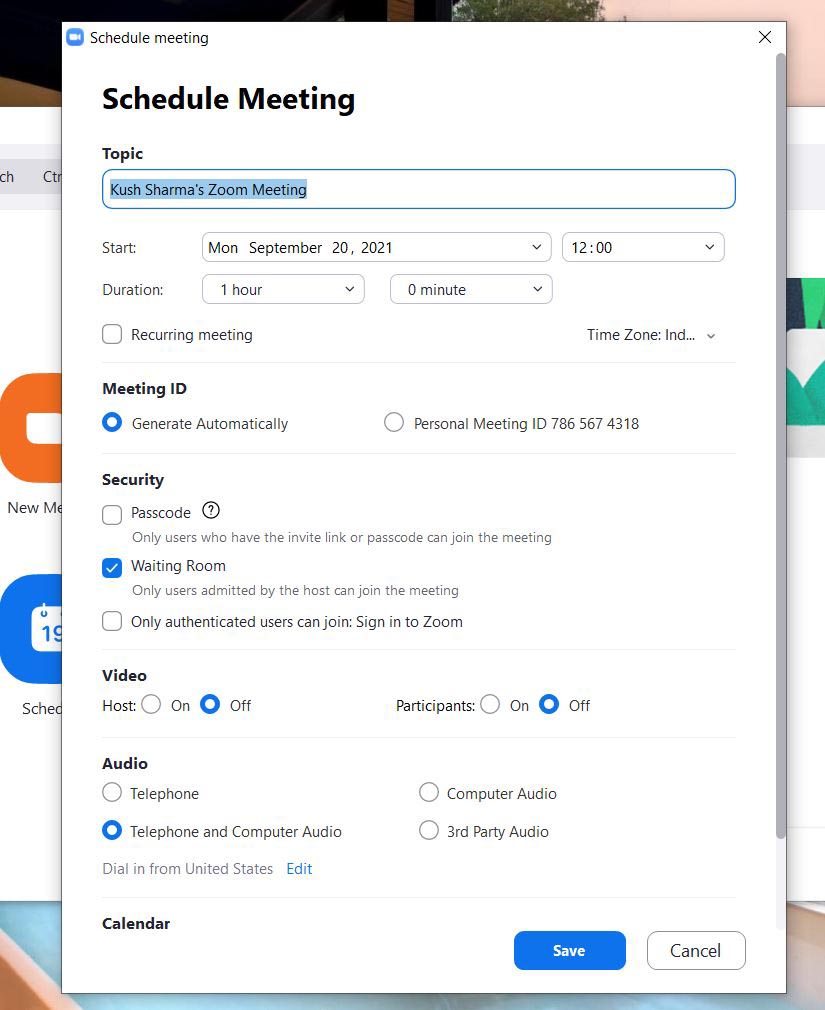
Now this window is very important because you will be choosing the different options and settings related to your meeting (webinar). So let’s go through each of these options:
Topic
This will be the title of your webinar. For example, How to Use Facebook ads to Sell Online Courses LIVE Webinar by Kush Sharma
Start and Duration
As the name suggests, this is where you will be mentioning the date, time and duration of the meeting.
This is important because ultimately when you share the link for the Zoom meeting, this date and time will be shown to your participants.
Also, a very important point to note here is that on the free plan, Zoom will only allow you to choose a meeting of a duration of 40 minutes. Which basically means that on the free plan, you will only be able to do a webinar for 40 minutes.
You will need to upgrade to the Pro plan to conduct webinars which are longer. And since webinars are usually at least 60 minutes long, you will most likely have to purchase the PRO plan at some point or other.
But only do that once you are comfortable with this whole process of setting up a webinar.
I will also talk about the pricing of Zoom plans in detail towards the ending of this tutorial.
Recurring Meeting
You can check this if you plan to do this webinar again and again but to be frank, I usually leave it unchecked.
Meeting ID
Leave this to “Generate Automatically“
Security
This setting is very important. You will see three options – Passcode, Waiting Room and Only Authenticated Users Can Join: Sign in to Zoom.
Let’s first see what each setting means and then we’ll see which one is the best:
Passcode: When you finish creating this meeting, you will receive a link for this meeting which you can share with your webinar participants.
If the Passcode option is unchecked, then you will also have to share the Passcode and your participants will have to enter that too join the meeting.
But if you check this option, then the Passcode gets embedded within the meeting link, which means that your participants only have to click on the meeting link to join your webinar.
We will be seeing how this meeting link with the embedded passcode actually looks later on.
I always leave this option checked since I don’t want my participants to perform an exta step of entering the Passcode.
So my suggestion would be to leave this checked.
Waiting Room: This is another important setting. If you leave this checked, then once your participant clicks on the meeting link to join the meeting, you will get a notification like “XYZ is attempting to join this meeting. Do you want to approve it?“. You will have to then click on “Yes” to approve it.
So you can keep this option checked in case you only want certain people to attend the webinar. For instance, let’s say you are doing a paid webinar and you only want those people to attend who have paid the fee.
Because a meeting link can be shared with anyone, this option will serve as a way to double-check that no one unauthorized is entering the webinar.
But the issue with this is if you have a lot of participants. For instance, most of my webinars are free and I take in hundreds of people.
Having to approve each person can be very time consuming and frustrating. So I usually leave this option unchecked.
I only check this option if I am doing a premium paid webinar.
I remember once I left this option checked by mistake for my free webinar and it was a nightmare because I had to keep approving hundreds of people and it really distracted me from focusing on conducting the webinar.
Only Authenticated Users Can Join: Sign in to Zoom – You can leave this option unchecked since a lot of your participants may not have signed in to Zoom. You just want them to click on the link and join.
So to summarize, for most people, just checking the Passcode option is enough.
Video
For this keep the Host option set to ON because most likely, you will want to be seen during the webinar.
For Participants, it’s completely your choice. I usually keep it OFF because I get hundreds of participants. But let’s say you are doing a webinar only for 10-15 people, then you want to keep it on so they can see each other too.
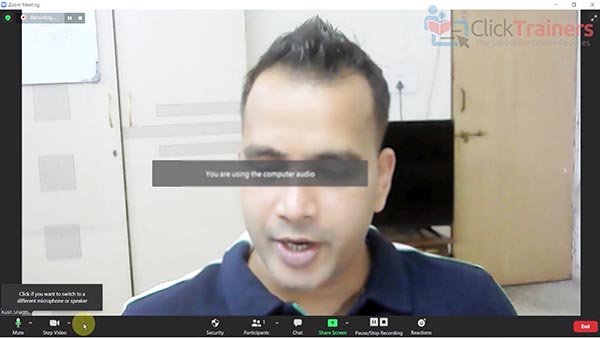
Audio
Here select Computer Audio since you will be using a USB microphone like the Blue Yeti which is plugged into your computer. Click here the full list of equipment I suggest using for a webinar.
Calendar
If you want to sync this meeting with your Google or Outlook calendar, then you can select the appropriate options.
What I usually do is that I keep this option set to Other Calendar and manually create a Google Calendar link for this webinar using a third party website and then I share that link with my participants. I will show you how to do this later on in this article.
Advanced Options
Here you will see a couple of options. Let’s got through them:
Allow Participants to Join Anytime – According to me, this option can sound confusing. Because you may feel that you should check this option so your participant can join late too.
But that’s not what it means.
The actual meaning of this option is that if you check it, your participants will be able to join the meeting even BEFORE you have started it. And that can look really unprofessional and even a bit embarrassing.
So make sure this is unchecked so your participants can only join after you have started the meeting/webinar.
If they click on the meeting link before you have started it, they will just see message which says that the meeting hasn’t started yet.
Mute Participants Upon Entry – By default, your participants can speak via microphone. While that is ok for a meeting, it is not ideal for a webinar. Because in a webinar, it’s usually just the host (you) talking. So make sure this is checked.
Automatically Record Meeting – If you select this option, then the meeting/webinar will be recorded. This is important if you have promised a recording to those who will not be able to attend the webinar.
You can also manually start and stop recording when the actual meeting is going on using the recording buttons which are present inside the Zoom meeting interface.
Approve or block entry for users from specific countries/regions – I have never used this setting so I always keep in unchecked.
That’s it!! Your meeting/webinar is set up perfectly!
Now click on Save and you will see a window open up like shown below:
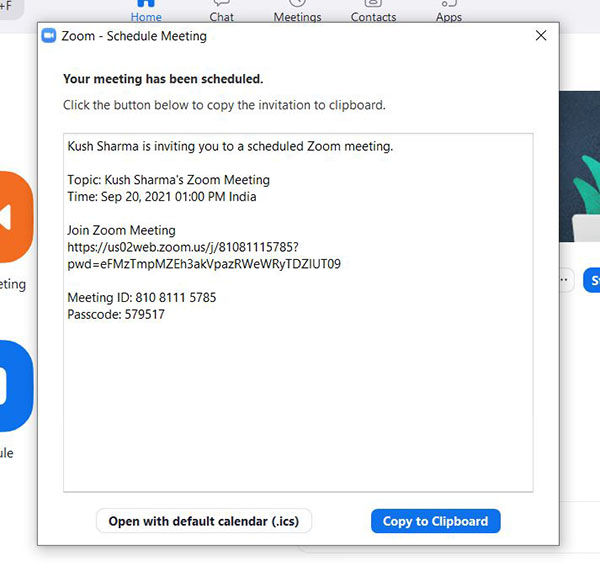
Here you can see the meeting link under Join Zoom Meeting.
This is the most important thing you have to copy and keep with you.
This is the link you will be sharing with your webinar participants.
If you observe closely you will see that this link contains the password too (written as pwd).
That’s because we had chosen to embed the passcode within the link in the earlier steps.
You can ignore the rest of the things.
So now that our meeting is set up, let’s see how to exactly conduct the webinar after we start a meeting and inside the Zoom meeting interface.
Using the Zoom Meeting Interface to Conduct a Webinar
The first thing you would need to do is to share the meeting link with your participants.
Then open up the Zoom app and Log in.
Click on the Meetings tab at the top and then select your meeting and then click on Start as shown below:
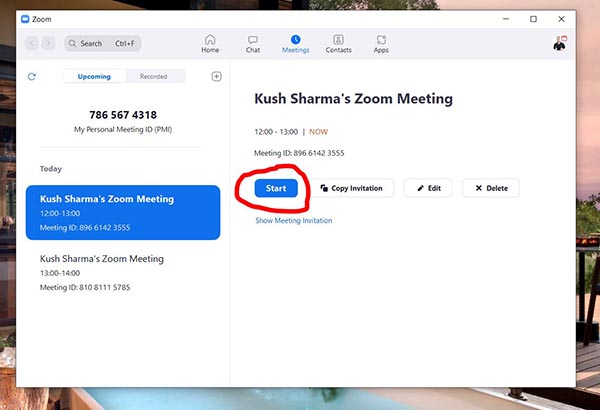
This will start your meeting and you will see the meeting interface like shown below:
Now the participants will be able to join too and you will be able to see the number next to the option which says Participants.
In this interface, there are a couple of important things to do which can help you in your webinar. Let’s see some of these:
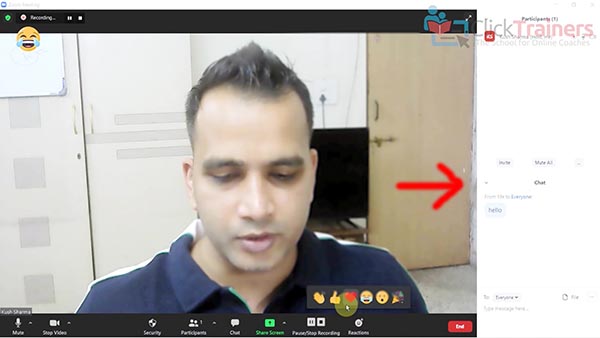
Participants and Chat
The first thing I like to do is to click on the Participants and the Chat option so that they open up on the right hand side, making it easier to view, like shown below:
Video Settings
The next thing I like to do is to click on the little arrow next to the option that says Video and then click on Video settings, like shown below:
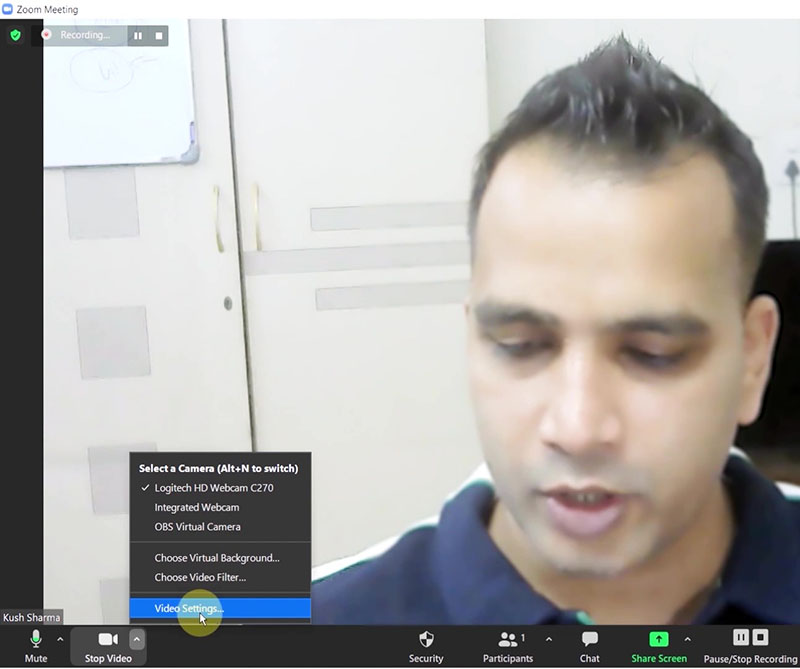
Here I like to check the option that says Adjust for Low Light (brightens up the webcam footage) and if you wish you can even touch up your appearance using the slider. In case you want to select a different webcam, you can do that also.
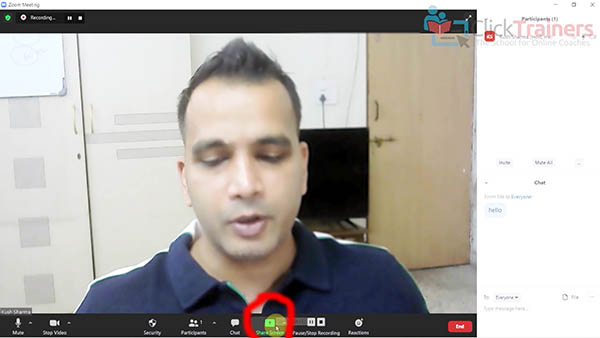
Screen Sharing
For most people webinars aren’t just restricted to the host talking in front of the camera. You will also like to show your participants some kind of presentation or a demonstration of a tool or software.
For this purpose you will need to share your screen.
To do this, you can click on the Share Screen option as shown below:
The you will be asked to select the window that you want to share.
You can select “Screen“.
Now whatever you do on your computer will be visible to your participants.
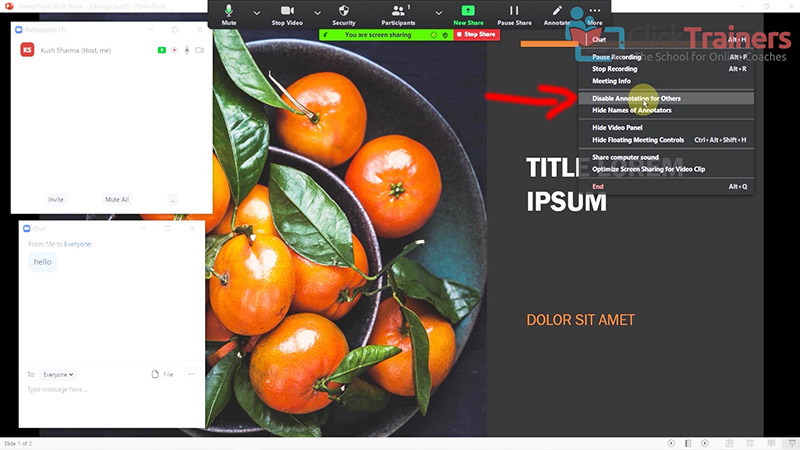
One important thing to note is that when you share your screen, Zoom automatically enables a feature called as Annotations, which means that you are can draw things on the screen too.
But the issue is that it enables annotations for your participants too and if there are some mischievous participants, they can start drawing things which will be visible to everyone else.
So you can disable annotations for the participants by clicking on the toolbar at the top and Clicking on the More option and the right and then selecting Disable Annotation for Others as shown in the image below:
Ending the meeting/webinar
Finally, when your webinar finishes you can click on End button on the bottom right corner and then selecting End Meeting for All.
If the meeting was recorded, then the conversion process of the recorded meeting will immediately start and it will be saved on your computer.
Important things to know about using Zoom for Webinar
In this part I want to discuss some random but important things that you should know when using Zoom to conduct webinars.
Types of accounts and their limits
By default your Zoom account is the free account, called as the Basic Account. A Basic Account allows you to host meetings for up to 40 minutes and for up to 100 participants.
Since most webinars are more than 40 minutes in length, you will most likely have to upgrade at some point to the PRO Account, which is the cheapest paid account that Zoom offers. You can see the cost in the image below:
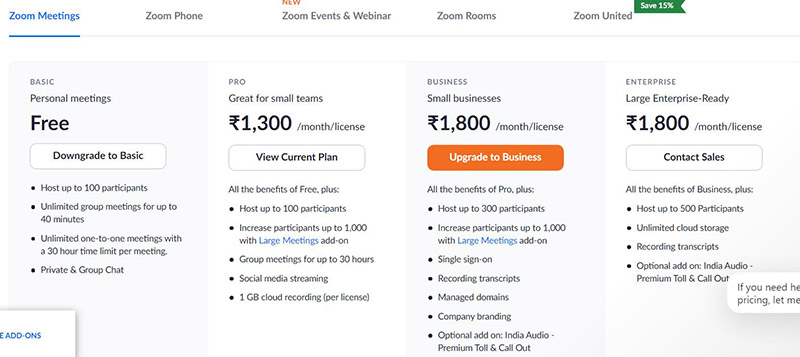
The main upgrade here is that you will be able to conduct meetings for up to 30 hours. So basically, the length of your webinar won’t be an issue.
But the participants limit still remains 100.
If you want to increase the participant limit, then Zoom offers add-on packages called Large Meetings, which enable you to increase the limit to 500 or 1000 participants.
Of course, there is an additional recurring fee for that which is added on top of your PRO account fee.
I won’t get into the details of that now since most people here won’t be needing till they become more used to doing webinars.
Using Zooms Registration Forms
Webinars are usually done for the purpose of lead generation and then selling products/services at the end of the webinar.
Therefore you need to capture your your prospects e-mail address when they register for your webinar.
Now usually this process is done by having a landing page on your website with an opt-in form that is connected to your email marketing software.
Once someone registers you can set up your email marketing software in a way that it delivers them an email with the Zoom meeting link.
But you can also use Zooms own registration form if you want to keep things simple as a beginner.
This can be done by logging in to the browser version of your account by going here. This is called as the Zoom Web Portal. It will look something like this:

Here, click on Meetings on the left and either hover over the name of an existing meeting to find the Edit button or click on Schedule a Meeting to create a new meeting.
Now you will see options similar to what we had seen before when we created the meeting via the Zoom app.
But this time you will notice that there is an additional option which says Registration, as shown below:
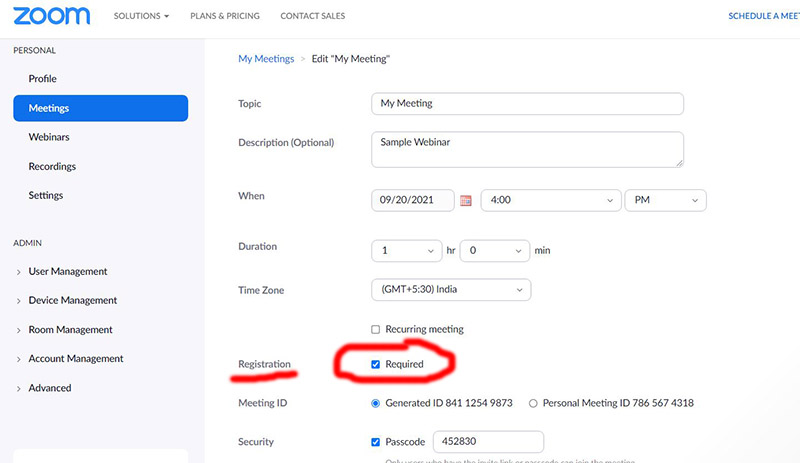
Here, check the box next to Required.
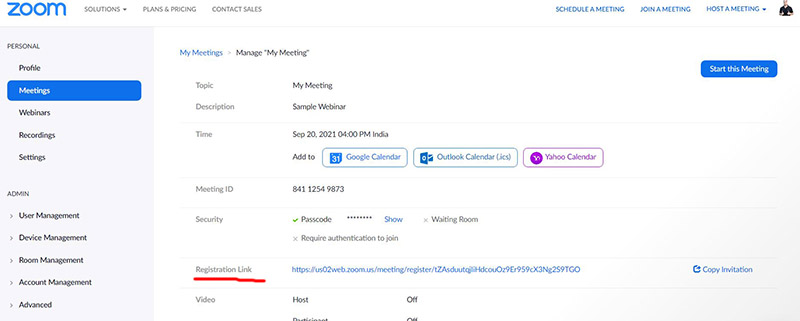
Then scroll down and save the meeting. Now you will be able to see the registration link as shown below:
When you click on this link, it will open up the registration form in another tab, like shown below:
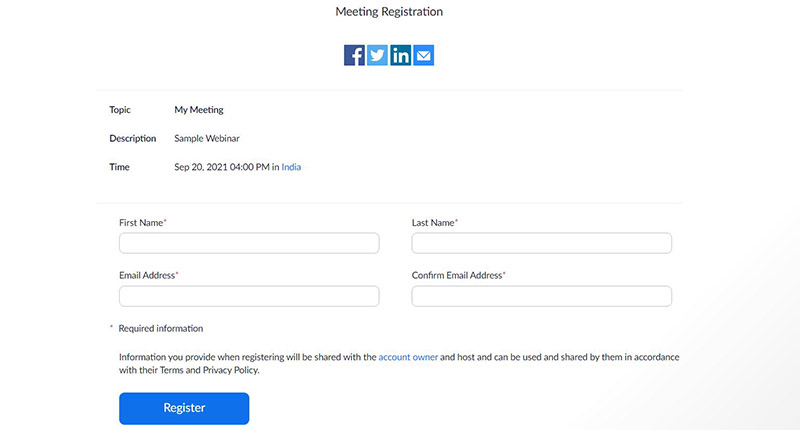
You can share this link with your participants.
If you wish, you can even edit this registration form a bit by going on the previous page (the page with the registration link) and scrolling down and clicking on the Branding option, like shown in the image below:

Generating a Google Calendar Link for Your Zoom Webinar
Like mentioned before in the article, I like to create the Google Calendar link separately for my Zoom webinars and then share this link with my participants so they can mark this webinar event on their Google Calendar..
This makes sure that they receive a reminder from Google and thereby increasing their likelihood of attending the webinar.
To create this Google Calendar link, you can use this website. You will see a page like this:
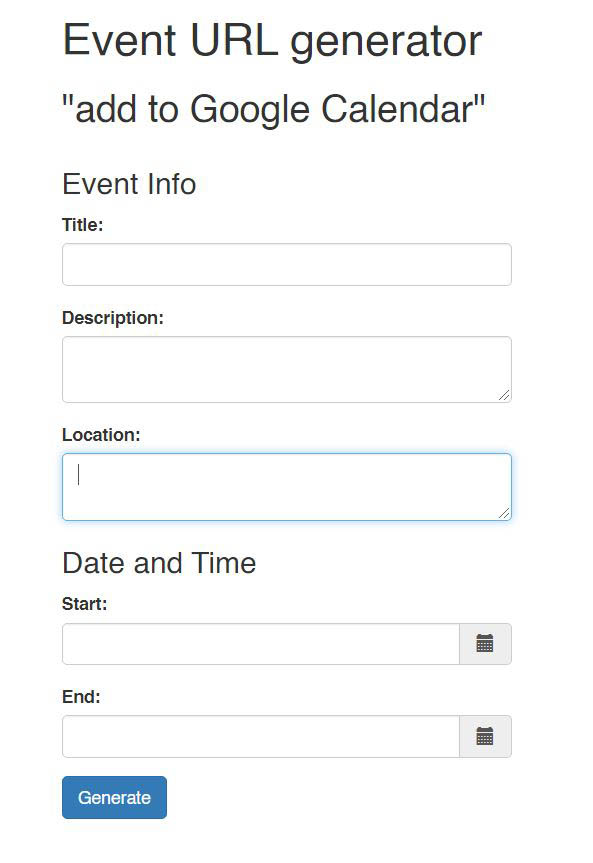
Just fill up the details and click on the Generate button. You will get a very long URL that you can shorten by using a service like Bitly.
So that’s it!
That’s the whole process of how to do a webinar on Zoom.
If you want to learn more about doing webinars to sell your online courses, products, services, etc, then make sure you check out my course Online Course Launchpad, where I even cover the part about how to market and sell your webinars.
In case you have any questions, do leave them in the comments below and I will be happy to answer them.